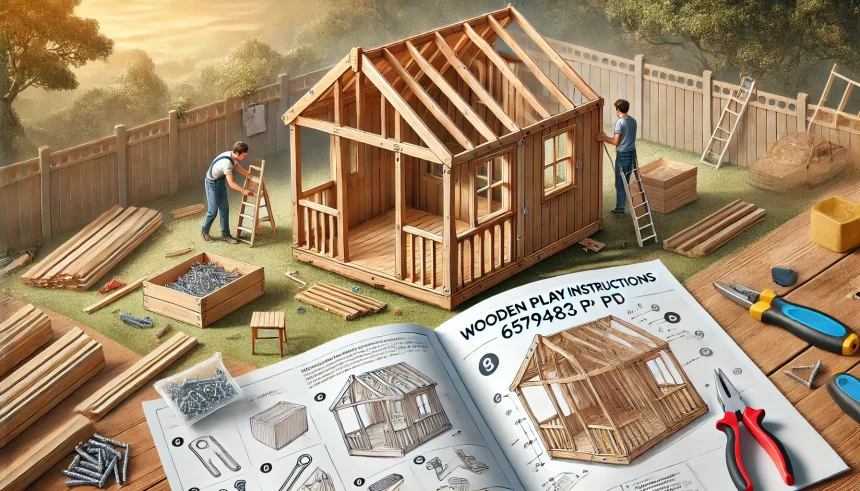
The wooden playhouse instructions 657948C3 PDF provides a step-by-step guide for assembling the Little Tikes Real Wood Adventures 5-in-1 Game House. This playhouse offers multiple interactive features, making it an exciting addition to any backyard.
Assembling a wooden playhouse requires careful attention to detail. The instructions include diagrams, safety guidelines, and a list of necessary tools. Following these steps ensures a smooth and efficient setup.
This guide is designed for easy comprehension, making it suitable for both beginners and experienced DIY enthusiasts. Clear labeling of parts and simple explanations help reduce confusion during assembly.
Understanding the structure before beginning is crucial. The playhouse consists of pre-cut wooden panels, hardware, and additional features like a canopy, play table, and chairs. Checking all components beforehand ensures nothing is missing.
Before starting the assembly, reading the full manual is highly recommended. This prevents errors, reduces the risk of accidents, and makes the process more enjoyable.
Safety Precautions Before Assembly
Safety is the most important factor when assembling a wooden playhouse. This structure is designed for children, so proper installation ensures durability and security.
It is essential to work on flat, stable ground. Uneven surfaces can cause instability, making the playhouse unsafe for use. Choosing a location free from obstacles like tree roots or rocks is ideal.
Adult supervision is required throughout the assembly. Children should not be involved in the building process due to the use of heavy panels, screws, and tools.
Before starting, gather all the necessary tools. The wooden playhouse instructions 657948C3 PDF suggests using:
- A power drill for fastening screws securely.
- A screwdriver and hammer for manual adjustments.
- A level tool to ensure proper alignment.
- Safety gloves and protective glasses to prevent injuries.
Lastly, always check for splinters or rough edges on the wooden panels. Sanding down any sharp corners helps prevent potential injuries after the playhouse is built.
Unboxing and Parts Checklist
Unboxing the package carefully is the first step to a successful assembly. The packaging contains multiple wooden panels, hardware, and additional accessories, all labeled for easy identification.
Before assembling, lay out all parts and compare them with the list provided in the wooden playhouse instructions 657948C3 PDF. Missing or damaged parts should be reported to customer support immediately.
Sorting the parts in an organized manner speeds up the process. Keeping screws, bolts, and wooden panels in separate sections prevents confusion and allows for a smoother workflow.
It is advisable to check the instruction manual for a visual reference. This helps in recognizing each piece, especially for those unfamiliar with assembling wooden structures.
If any parts appear defective, do not proceed with the assembly. Contacting the manufacturer for replacements ensures the playhouse is built safely and correctly.
Step-by-Step Assembly Instructions
The foundation is the first step in the assembly. Laying the floor panels correctly is crucial for stability. The playhouse should be level before moving on to the walls.
Next, the side and back panels must be attached securely. Each panel should be aligned properly, and screws should be fastened tightly to prevent wobbling.
After the walls are in place, the roof is installed. The wooden playhouse instructions 657948C3 PDF includes details on how to position the panels correctly to ensure a secure fit.
Doors and windows are then attached. Ensuring that hinges are aligned correctly allows for smooth operation. A test run should be conducted to check that the doors and windows open and close easily.
Final touches, such as installing decorative elements, complete the setup. Checking every connection ensures that all parts are secure before the playhouse is used.
Final Checks and Stability Testing
Before allowing children to use the playhouse, a stability check is necessary. Pressing gently against different sides helps identify any weak points.
Tightening any loose screws ensures the structure remains firm. Even minor instability can compromise safety, so adjustments should be made if needed.
Testing the doors and windows for smooth operation is also important. If any parts feel stiff, applying a small amount of lubricant can help.
A weight test can help confirm the structure’s durability. The playhouse should be able to withstand minor force without shifting.
Conducting a final inspection ensures that everything is in place. The is used.
Maintenance and Care Instructions
Regular maintenance helps extend the lifespan of the wooden playhouse. Cleaning the structure every few weeks prevents dirt buildup and keeps it looking new.
Weatherproofing is essential, especially for outdoor playhouses. Applying a protective sealant can help prevent water damage and wood decay.
Routine inspections should be performed to check for loose screws or worn-out components. Tightening connections prevents unexpected accidents.
If the playhouse is exposed to extreme weather conditions, covering it with a tarp can provide extra protection. This helps prevent damage from heavy rain or snow.
The wooden playhouse instructions 657948C3 PDF also suggests repainting or resealing the wood every few years. This not only enhances durability but also refreshes its appearance.
Troubleshooting Common Issues
Occasionally, some parts may not fit as expected. Checking the instructions carefully can help identify whether parts have been assembled incorrectly.
If alignment issues occur, loosening the screws slightly and readjusting the panels before tightening them again often resolves the problem.
For missing or damaged components, contacting the manufacturer is the best option. The wooden playhouse instructions 657948C3 PDF includes customer support details for replacement parts.
Screws may sometimes come loose over time. Performing periodic maintenance and re-tightening screws can prevent structural weakness.
If the playhouse wobbles, placing small support blocks under uneven areas can provide extra stability. Ensuring the foundation is firm is key to long-term safety.
Customer Support and Warranty Information
Little Tikes provides customer support for all their products. If any issues arise during assembly, reaching out to their service team can be helpful.
The wooden playhouse instructions 657948C3 PDF includes warranty details. Understanding what is covered under the warranty ensures quick resolution of any product defects.
Customers can contact the manufacturer via phone or email. Their official website also provides additional resources, such as FAQ sections and video tutorials.
If replacement parts are needed, ordering directly from the manufacturer guarantees compatibility with the original structure.
Keeping the purchase receipt and warranty details in a safe place is always advisable. This makes it easier to claim support if needed.
Conclusion
Building a wooden playhouse is an enjoyable and rewarding project when done correctly. Following the wooden playhouse instructions 657948C3 PDF ensures a safe and sturdy setup.
Checking all parts before assembly and following step-by-step guidelines reduces the chance of mistakes. Taking the time to properly secure each panel ensures long-term durability.
Regular maintenance is essential for preserving the playhouse. Weatherproofing, cleaning, and routine inspections help maintain its quality over the years.
If issues arise, the troubleshooting guide and customer support options provide easy solutions. The warranty also offers additional protection for defects.
With proper setup and care, the wooden playhouse can provide children with a safe and enjoyable play space for years to come.
FAQs
Where can I find the wooden playhouse instructions 657948C3 PDF?
You can find the manual on the official Little Tikes website or request a copy from customer support if missing.
What tools are needed for assembling the wooden playhouse?
Basic tools like a power drill, screwdriver, hammer, and a level tool are required for proper installation.
How long does it take to assemble the wooden playhouse?
On average, assembly takes 3–5 hours with two adults, depending on experience and preparation.
Is the playhouse weatherproof, or does it need extra protection?
The wood is treated, but adding a protective sealant helps increase durability against weather conditions.
Can the playhouse be disassembled and moved?
Yes, but it requires careful dismantling, keeping track of screws and panels to reassemble correctly.